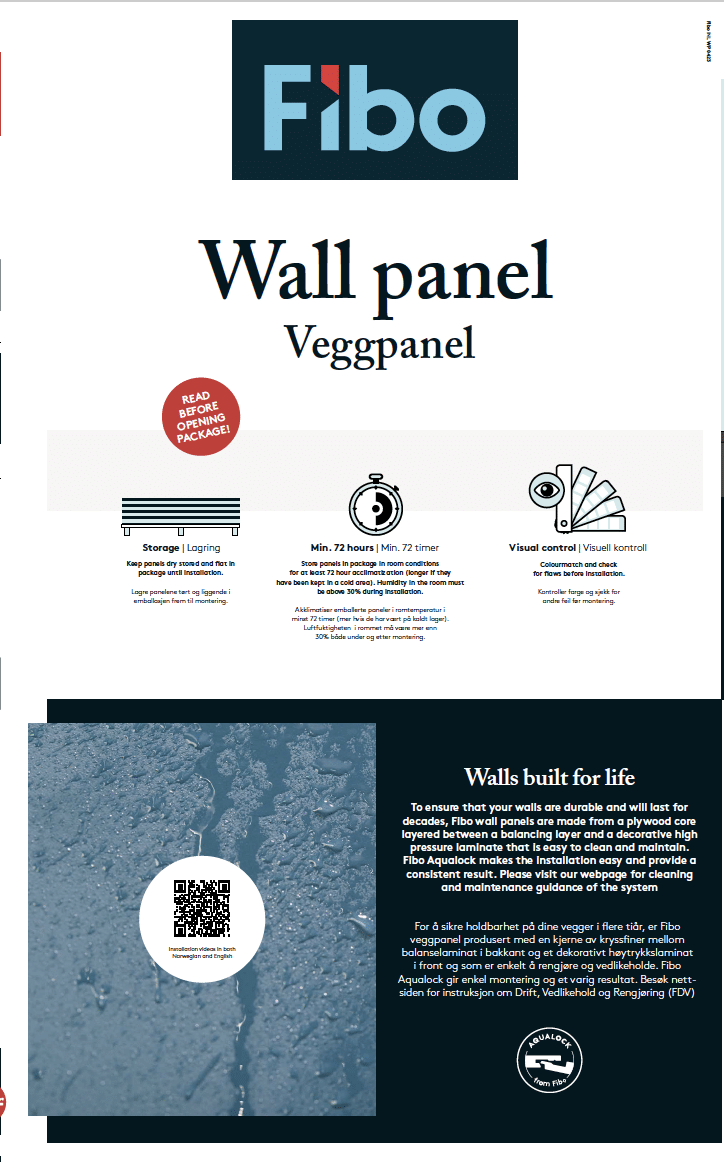
Installation instructions Fibo Wall Systems
Fibo wall systems are made with different product components that create a simple and complete solution from start to finish. The wall system is installed by first setting up profiles like a base profile and internal corner profiles. This will form the framework of the wall system. The panels are installed, and all joints and cut surfaces are sealed with Fibo Seal. You finish the installation by using L-shaped finishing profiles. Accessories for support during the installation session are also available to make it easier and secure a good result.
Preparations before installing Fibo
Panel handling before opening packages
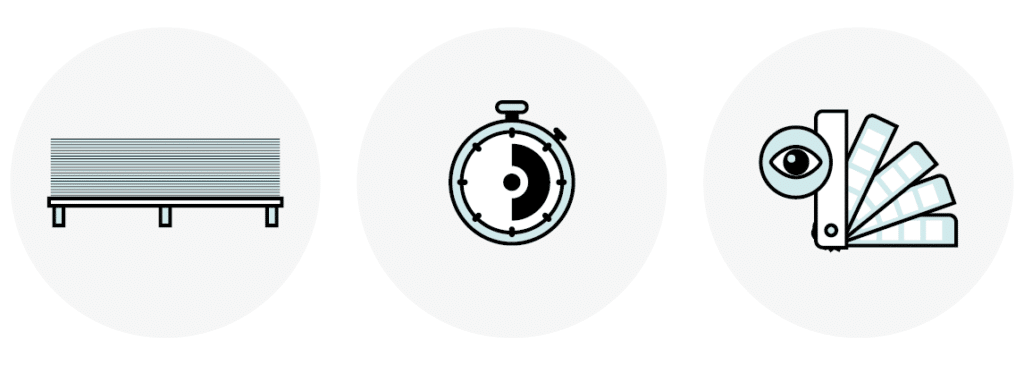
- Keep panels in the plastic packaging and in a dry environment. Lay flat when storing and transporting.
- Fibo wall panels must be kept at room temperature for at least 72 hours prior to installation.
- Remove the plastic wrapping and check for any surface damage.
- Carefully move the panels, avoiding any scapes and scratches along the edges and surfaces.
Preparing the floor and back wall
The floor must be prepared before installing panels on the wall. The floor membrane must extend at least 6-inches up from the floor. Fibo panels can be installed on existing walls or directly on the wall studs. The studs should be 600mm apart and 800mm tall. When installing on wall studs, the center distance must be 600mm and the horizontal blocks/nail strokes must have a center distance of 800mm. The wall must be reinforced where you hang a sink basin or other bathroom fixtures. When installing Fibo on existing walls, you can use one of the following three alternatives:
- Plywood board 12mm – 15mm
- 18mm rough panel (mounted horizontally c/c 300mm)
- 15mm OSB klasse 3
When installing on concrete or steel studs, contact our customer service department.
Grouting and cleaning during installation
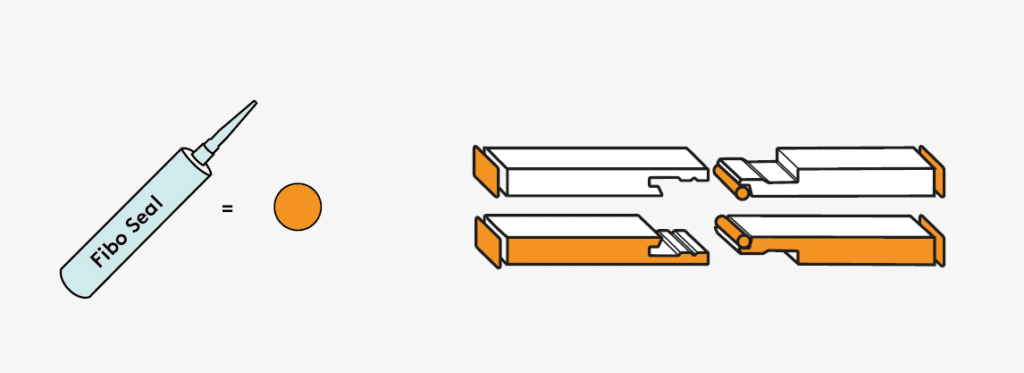
Click-lock, cut surfaces and profiles must be cleaned before grouting with Fibo Seal. We recommend using Fibo Seal on all plate joints and corner profiles.
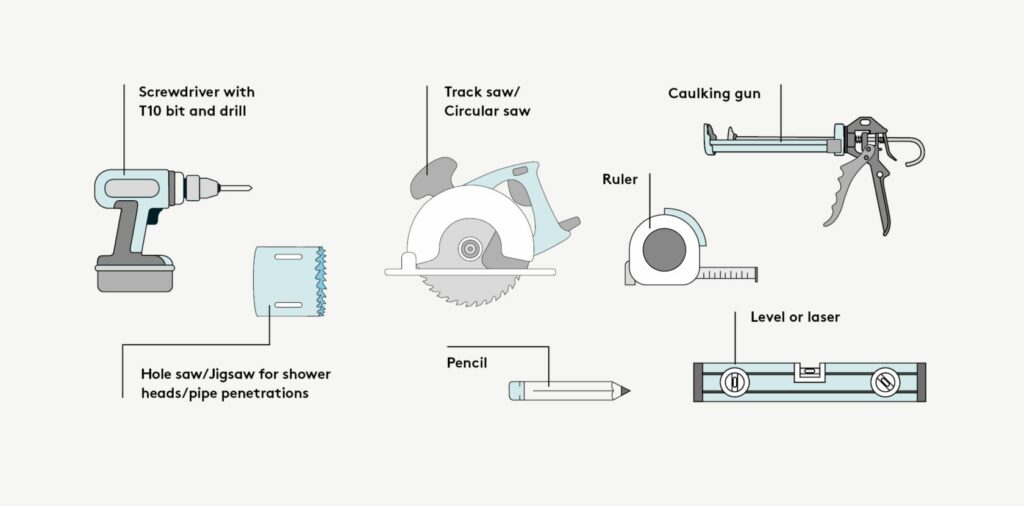
Tools you need
Wall Panel installation instruction
Our 100% waterproof Wall Panels can be installed on various back wall options as well as directly on to wooden or steel studs.<br>Underneath you will find downloadable PDF of our latest installation instructions and our Product & Installation Guide.<br>
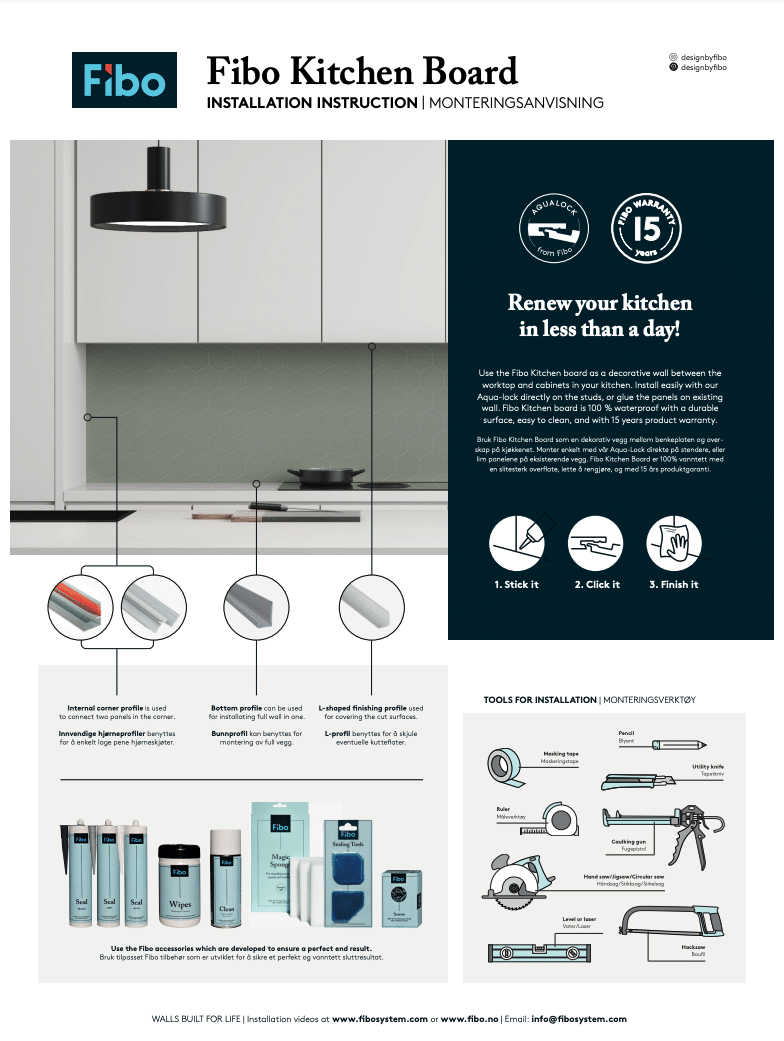
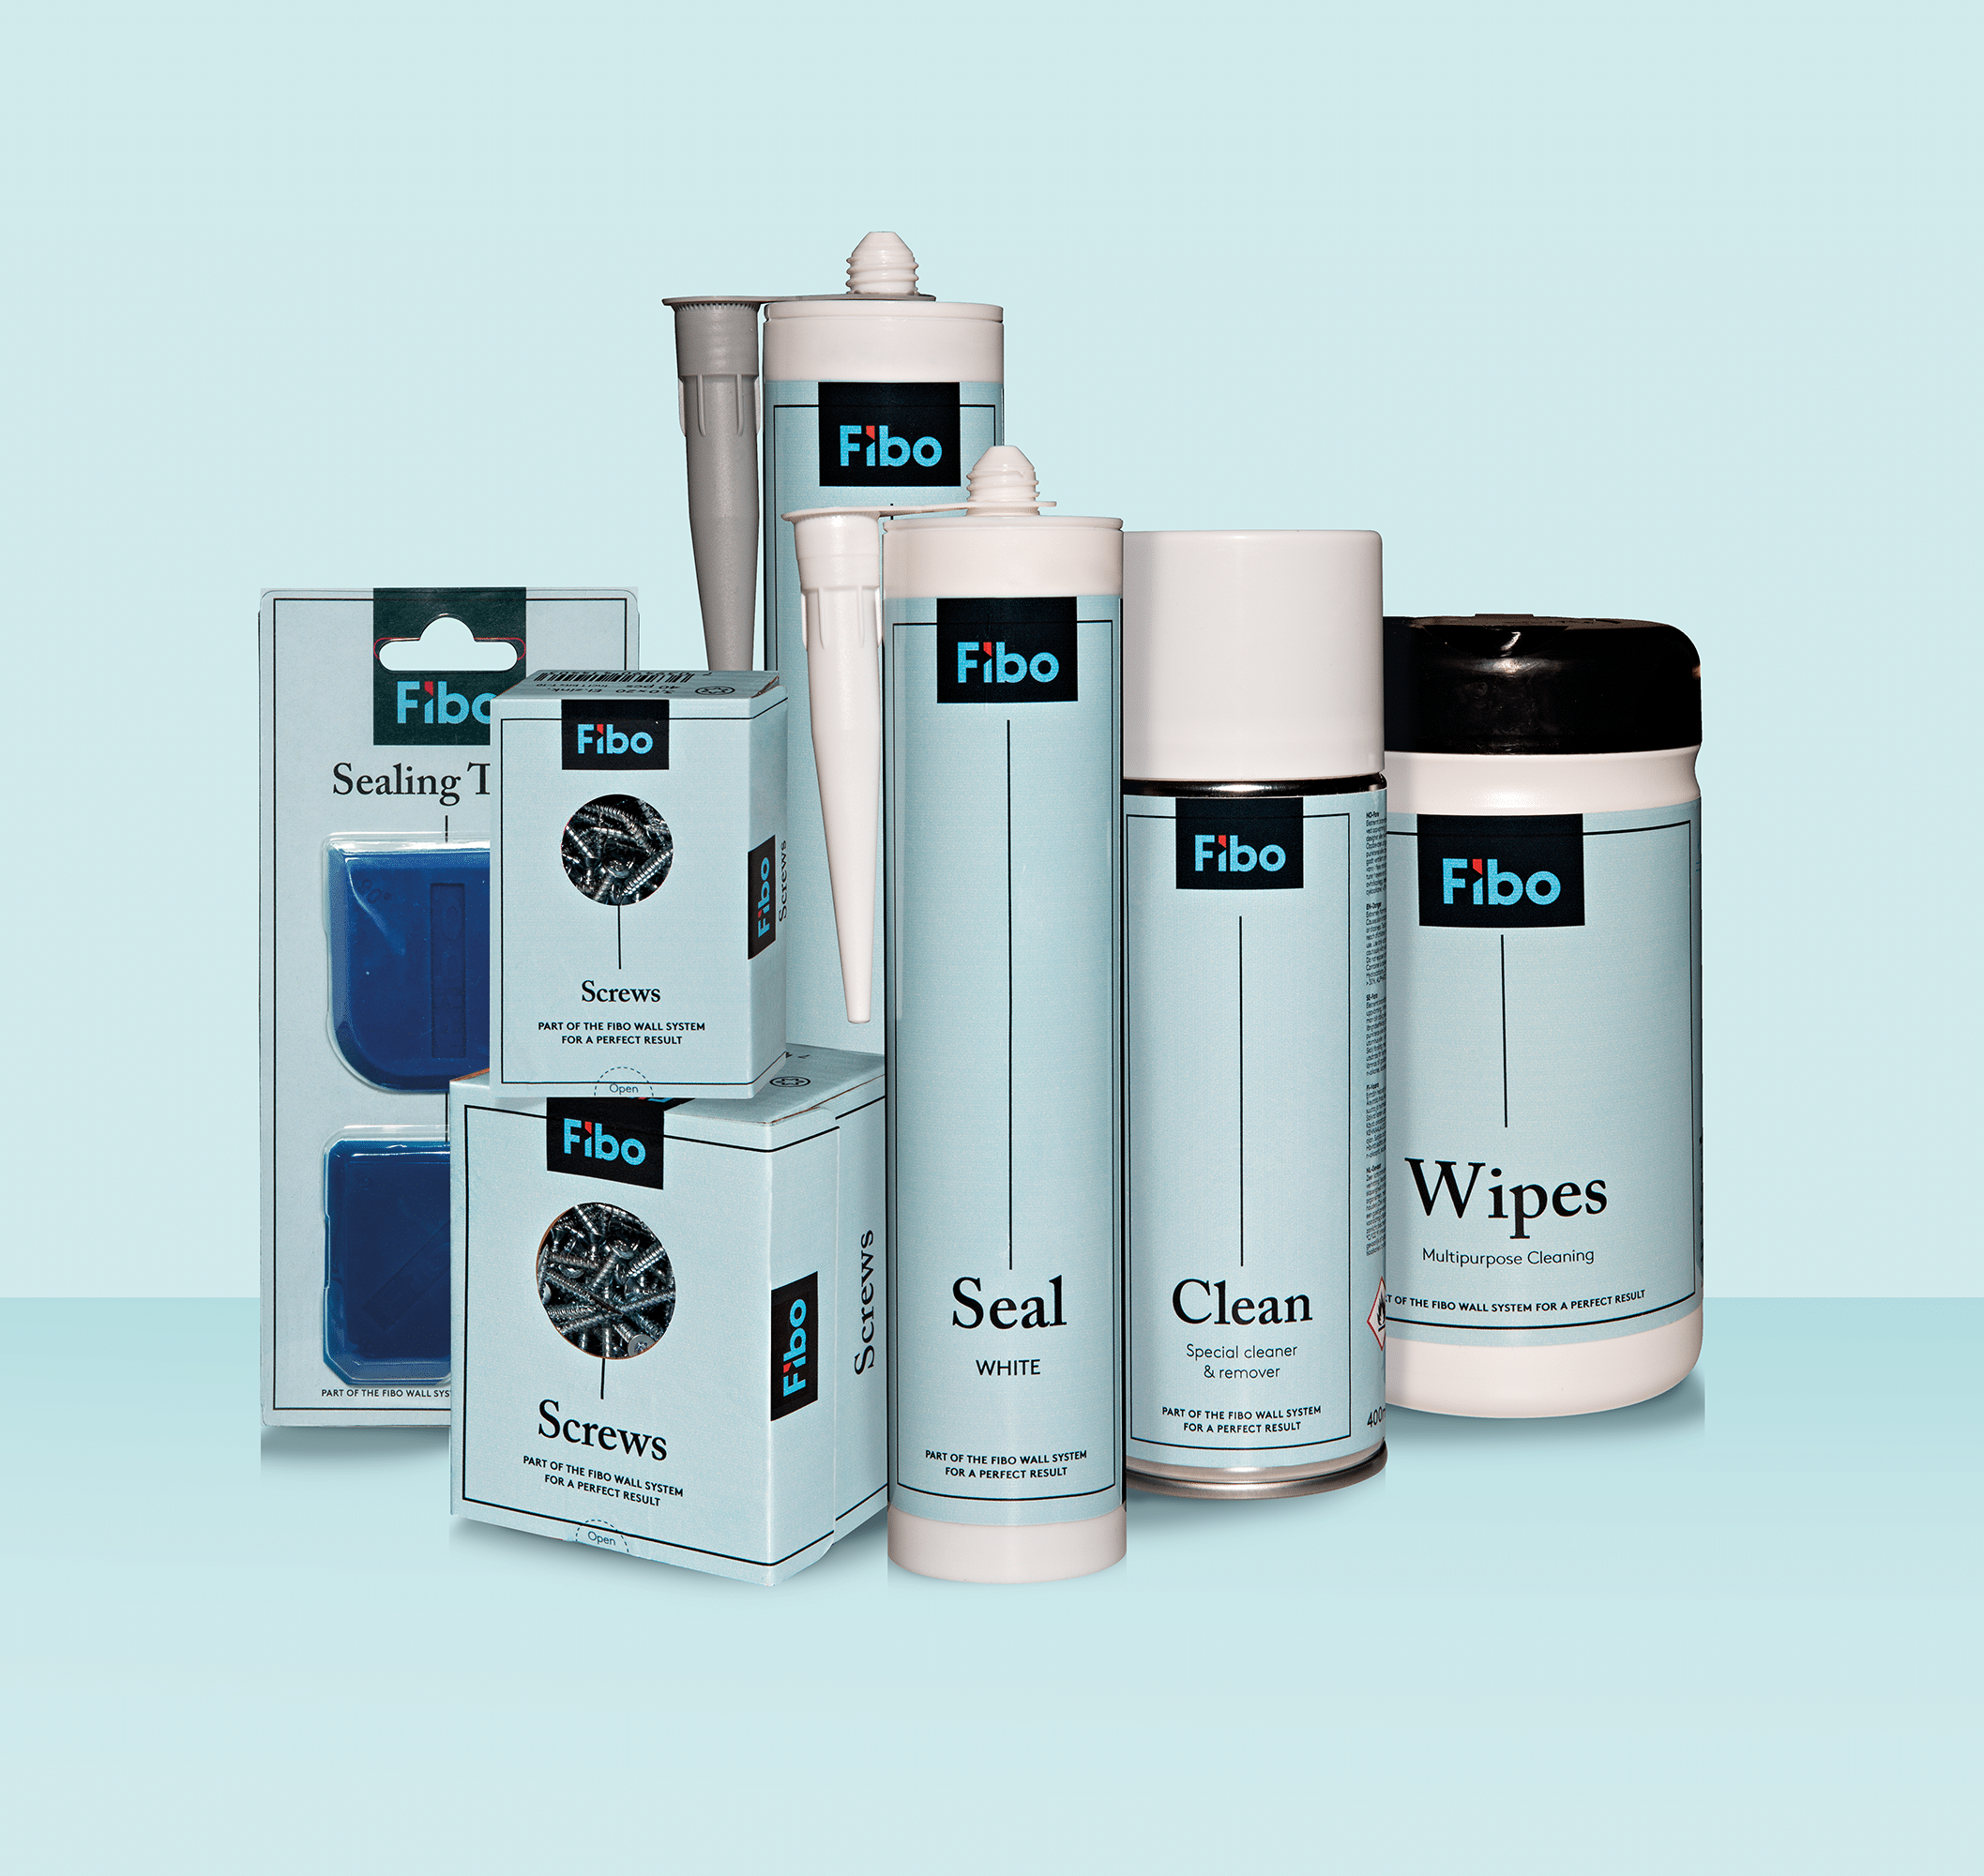
Find the correct accessories
Fibo installation accessories come from our own line of wall system completion products – and ensure both easy installation and a perfect result.
Frequently asked questions
For installation on masonry/concrete walls above ground, use the following solution: Make sure the concrete is dried out and has a maximum moisture level of 85% when mounting. The substrate must be level and provide good attachment possibilities for nails and screws where the panels meet. Remember, where you hang up washbasins or other heavy objects, there must be extra reinforcement.
Forget about the moisture barrier, primer, fix and joints. Fibo panels have an integrated moisture barrier and you can mount the panels directly on the wall framework.
Fibo should not be mounted directly on tiles. If there is an outer wall or wall against cold rooms, there must not be a double-vapor barrier according to Norwegian research institute SINTEF’s building studies results. Because Fibo panels are approved as a vapor barrier, the old vapor barrier must be removed behind the panels.
You can install Fibo on drywall. With two layers of drywall, you don’t need horizontal cross sections between the studs. Remember to use screws long enough to penetrate the drywall and into the studs for secure attachment.
Keep panels stored flat – in an unopened package – until installation.
Store panels in package in room conditions for at least 72 hour acclimation (longer if they have been kept in a cold area). Colourmatch and check for flaws before installation.
Everything you need to know is in our installation instructions. It pays to prepare well in advance!
Fibo is both easier and faster to install than laying tiles. It’s also cheaper. You can either assemble yourself or get help from a craftsman. Proceed carefully, follow our installation instructions, take a picture showing where the joints are, overlap the membrane and use the checklist we provide to help document the installation. This way you get a great result with 15 years warranty. If you are unsure on how to install Fibo, please contact our customer service
The Product will not delaminate, stain, fade or crack during the Warranty period as a result of defects in materials and manufacture of the Product, when properly installed in accordance with Fibo’s installation instructions and cared for in accordance with Fibo’s instructions for Cleaning and Maintenance or Product Guide, more details in Technical Data
If you plan to install a washbasin, faucet, wall-mounted toilet or other bathroom furniture on the panel you need extra support behind the panel. For example a thick sheet of plywood – or directly onto studs behind the panel.
Fibo Seal is specially developed for our panels and is ETAG 022 approved. Fibo Seal is also supplied in the same colors as the joints on the panels. Do not use silicone, only MS polymer sealant approved according to SINTEF TG 2289.
It is easy to keep Fibo clean – and you avoid all the dirt that tends to stick to tile grout. Use a clean cloth and warm water. For stubborn dirt, you can use a non-abrasive cleaner. You will find more information in our maintenance instructions.
Measure the total length (inch) of the walls, including windows and doors. Then divide the total length of the walls by 600 mm. Round up to the nearest whole number. The sum is the number of panels you need. Each package contains two panels. Remember accessories!
You can use Fibo behind normal electric ovens and induction units that do not radiate more than 80 °C (176 °F) towards the back wall. If you have a gas oven or woodstove that produces higher temperatures, do not use Fibo without a flame-resistant material on the back wall.
Fibo can be used in most rooms, but there are exceptions. Like swimming pools and saunas. On the other hand, Fibo is excellent for changing rooms, showers and other spaces adjacent to saunas and swimming pools.
Yes, Fibo is approved for all wet room zones, for example, in the bathroom shower. This is due to the membrane in the sealing layer. Our panels are excellent in all wet rooms, but also where extra-durable walls are needed, like in hallways, garages or laundry rooms. Fibo Kitchen Board is built the same way and also waterproof.
Many of our panel models are delivered in 3020 mm heights. If the model you choose cannot be found in the desired height, we have a stacking profile you can use to add the preferred height to your Fibo room.
Yes! Our panels are tested and approved for wet rooms. The panels also obtain a Greenguard certification